How to Properly Install Anchor Bolts for Maximum Stability?
Proper installation of anchor bolts is critical for structural stability. According to the American Concrete Institute, improperly installed anchor bolts can lead to failures, costing the industry millions annually. In fact, nearly 30% of construction defects are attributed to inadequate anchoring systems. These statistics highlight the importance of understanding best practices for anchor bolt installation.
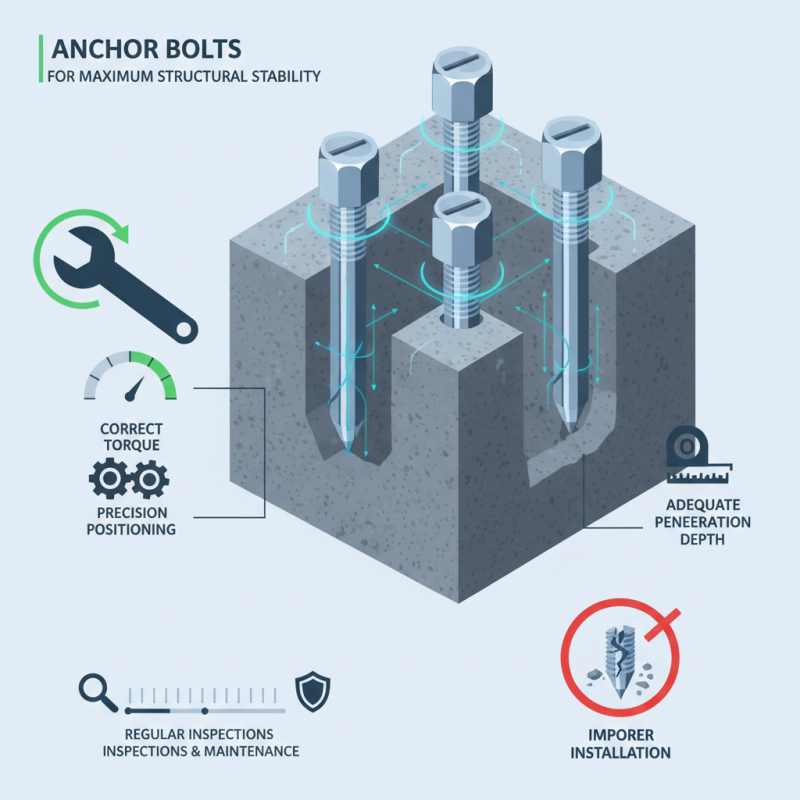
Quality materials and precise positioning are essential. Anchor bolts must penetrate deep enough into the substrate for effective load transfer. Many contractors overlook these details. A failure to adhere to specified torque settings can lead to loosening over time. This is a common mistake that can compromise the integrity of the entire structure.
Moreover, environmental factors can affect the performance of anchor bolts. Corrosion is a significant concern in some locations. It can significantly weaken the bolts, leading to catastrophic failures. Regular inspections and maintenance should be routine to address these issues. A comprehensive understanding of anchor bolts and their installation will ensure stability and safety in any construction project.
Understanding Anchor Bolts and Their Importance in Construction
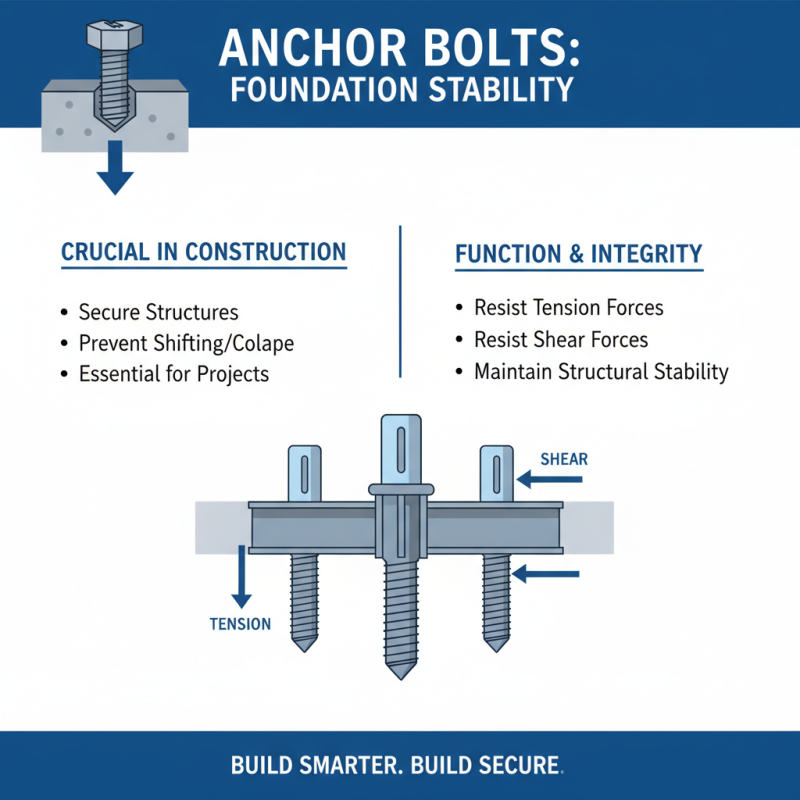
Anchor bolts are crucial components in construction. They secure structures to their foundations, providing stability. Without proper installation, a building may face shifting or even collapse. Understanding their role is essential for any construction project. These bolts resist tension and shear forces, helping maintain structural integrity.
When installing anchor bolts, precision matters. The hole depth and spacing influence effectiveness. Many overlook these details, compromising stability. Additionally, using the right materials, like corrosion-resistant steel, is vital for longevity. Inspecting the bolts regularly can prevent long-term issues. Ignoring maintenance may lead to unexpected failures down the line.
Proper alignment is another common oversight. Misaligned bolts can weaken the entire structure. It’s essential to verify positioning during installation. Many workers may rush this step, thinking it’s minor. Yet, this can have significant implications. Reflect on these aspects to improve practices and ensure safety in construction.
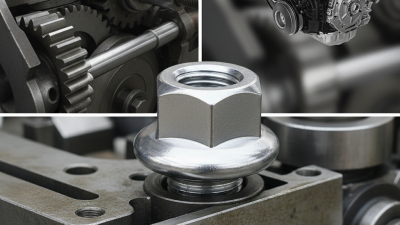
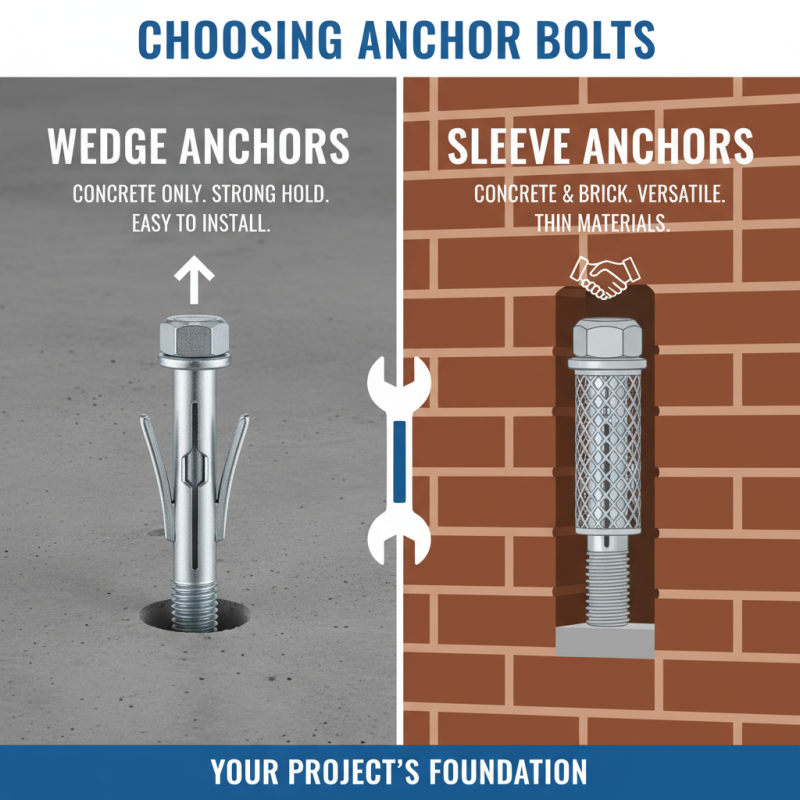
Choosing the Right Type of Anchor Bolts for Your Project
Choosing the right type of anchor bolts is crucial for your construction project. There are various types to consider. For example, wedge anchors are great for concrete. They provide strong hold and are easy to install. In contrast, sleeve anchors work well for both concrete and brick. They are versatile and reliable, especially in thin materials.
When selecting anchor bolts, evaluate the materials and environment. Will the project be exposed to moisture? If so, stainless steel or coated options are best. These can resist corrosion over time. Remember, not all projects require the same type. You may need to adjust based on your specific needs.
Tips: Always check the load specifications before making a purchase. A common mistake is underestimating the weight the anchor must support. Additionally, consider the embedment depth for optimal performance. It can significantly enhance stability. Lastly, if you are unsure, consult with an expert. Better to ask questions than to risk safety.
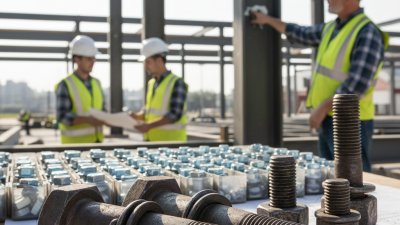
Preparing the Site and Tools for Anchor Bolt Installation
Preparing the site for anchor bolt installation is crucial for success. Start by assessing the area where you plan to anchor. Clear away debris and any loose soil. An uneven surface can lead to instability later. Mark the intended locations precisely, using a chalk line or spray paint. This helps ensure the bolts will be placed accurately.
Gather the necessary tools before starting. Common tools include a hammer drill, masonry bit, and level. Additionally, protective gear is essential. Safety goggles and gloves can prevent injuries. It’s easy to overlook safety when focused on precision.
Consider the type of material you’re anchoring into. Concrete requires different preparation than wood or metal. You may need to adjust your tools based on the surface. Take time to double-check your plans. Small mistakes now can lead to larger issues later on. Whether it's misalignment or inadequate depth, addressing these can save you from a headache down the road.
Step-by-Step Procedure for Installing Anchor Bolts
When installing anchor bolts, a precise method ensures durability. Start by selecting the right bolt type and size for your project. Drill holes in a concrete or masonry surface. Ensure the depth is appropriate as per your bolt specifications. Clean the holes thoroughly to remove debris. This step is often overlooked, yet it is crucial for strong bonding.
Next, insert the anchor bolts into the holes. You may need a hammer to drive them in firmly. Pay attention to positioning; bolts should be level and aligned properly. Sometimes, it’s easy to overlook this during a rush. Fill any gaps with epoxy or concrete for additional support. Allow sufficient curing time, which is vital for achieving maximum stability.
After curing, check the anchor bolts for tightness. Often, bolts may feel secure but may not be torqued properly. Test them before final use. A poor installation can lead to failure, especially under heavy loads. Some installations may appear perfect but require a second look. Taking time at each step improves overall strength and reliability.
Inspecting and Testing Installed Anchor Bolts for Stability
Inspecting and testing installed anchor bolts is critical for ensuring maximum stability. First, check for any visible damage. Look for cracks or corrosion. If any issues arise, it's essential to address them. A simple inspection can prevent bigger problems later.
Half of the time, bolts seem secure but are not. This can happen due to improper installation. Use a torque wrench to test the tightness. Compare the results with the recommended values. If they don't match, you might need to tighten them again.
Tips: Always wear protective gear during inspections. Ensure the area is clear of hazards. After checking the tightness, inspect the surrounding area for signs of movement. Take your time. Rushing through the inspection can lead to oversight. Accuracy is key.
How to Properly Install Anchor Bolts for Maximum Stability? - Inspecting and Testing Installed Anchor Bolts for Stability
| Dimension |
Specification |
Installation Method |
Testing Method |
Stability Rating |
| Diameter |
16 mm |
Hammer Drill |
Pull Test |
A |
| Embedment Depth |
200 mm |
Mechanical Anchor |
Torque Test |
B |
| Concrete Strength |
25 MPa |
Epoxy Set |
Shear Test |
A |
| Spacing |
300 mm |
Percussion Drill |
Test Load |
C |
| Angle of Load |
15 Degrees |
Installation with Level |
Bending Test |
B |